Set up a merchant account to enable your White Label project to accept cryptocurrencies

Set up a merchant account to accept the payments for a White Label by following these steps.
Step 1. Create a Coinpayments account
To register Coinpayments account click on this link: https://www.coinpayments.net/register
You will be required to fill out the fields in this form (name, email, password, country), choose the time zone, and click on the Register button. Please see the screenshot below.
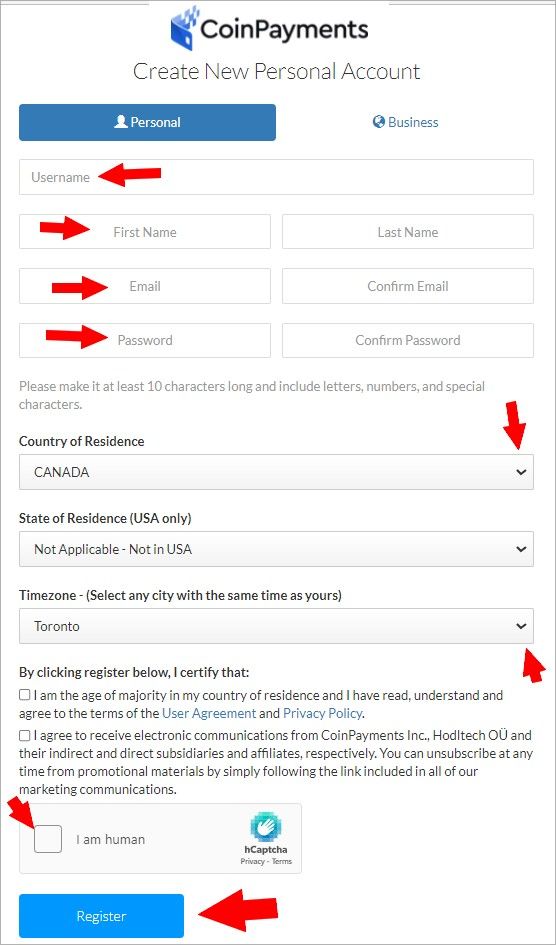
Please note: You can choose the Person (for an individual) or the Business (for an entity) account.
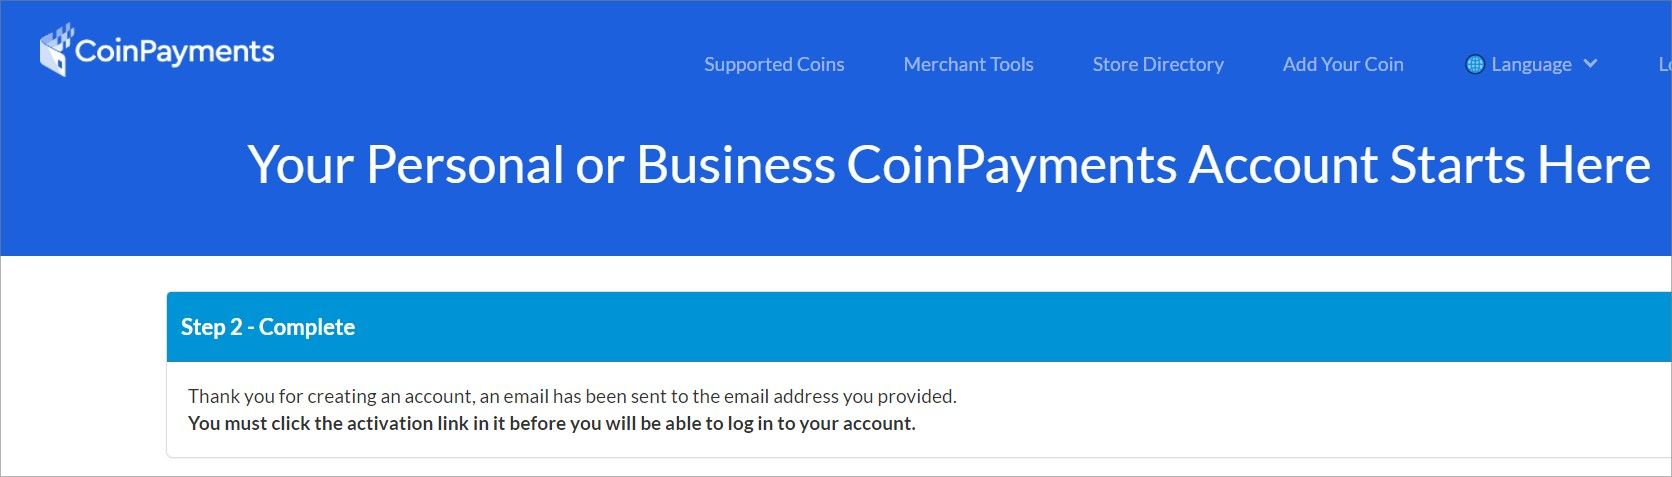
Please, confirm your email with the Coinpayments. Please see the screenshot
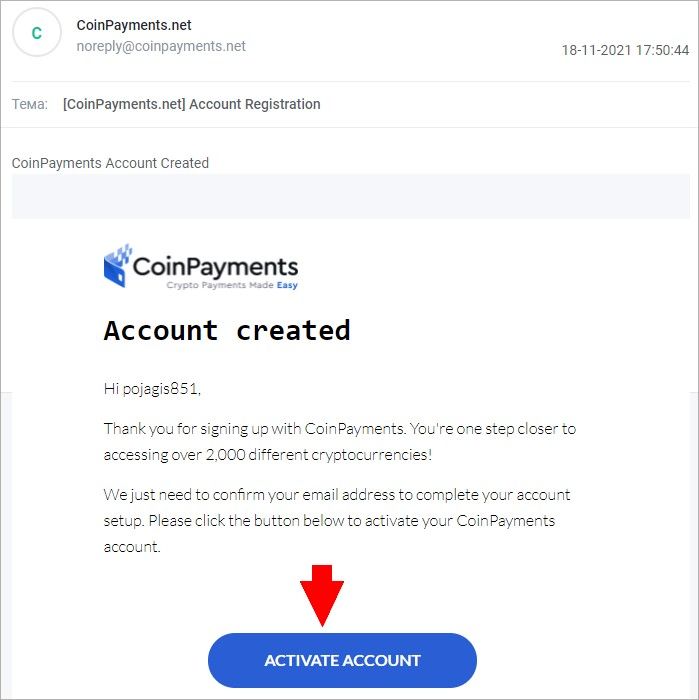
Please open the message from CoinPayments in your inbox and activate an account by clicking the ACTIVATE ACCOUNT button. Please, see the screenshot below
You will be able to access the CoinPayments site by clicking on the word here. Please see the screenshot below

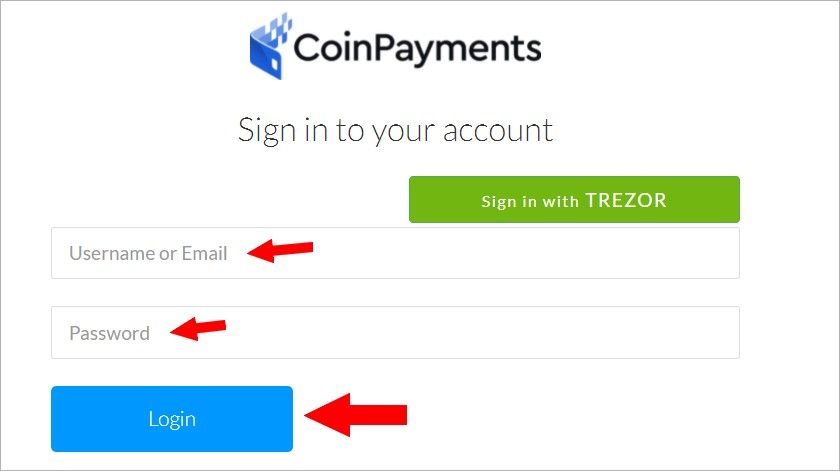
You will be prompted to the Login page. Please, enter your email and the password, then click on the Login button. Please, see the screenshot below
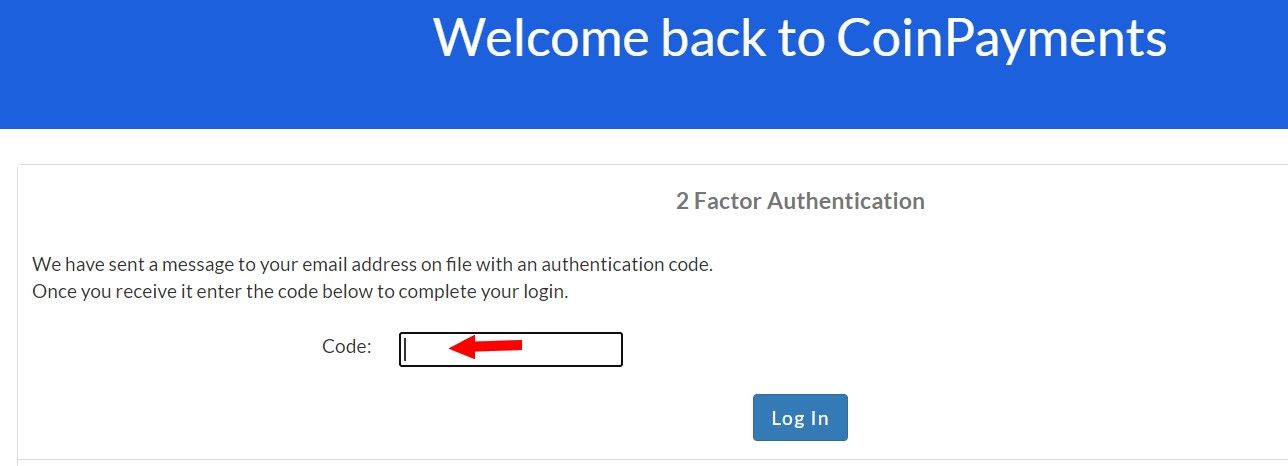
After logging in, you will be prompted to enter the 2FA code. You will find it in the email message from the CoinPayments. Please, enter the 2FA code in the correlated field and click on the Login button. Please see the screenshot below
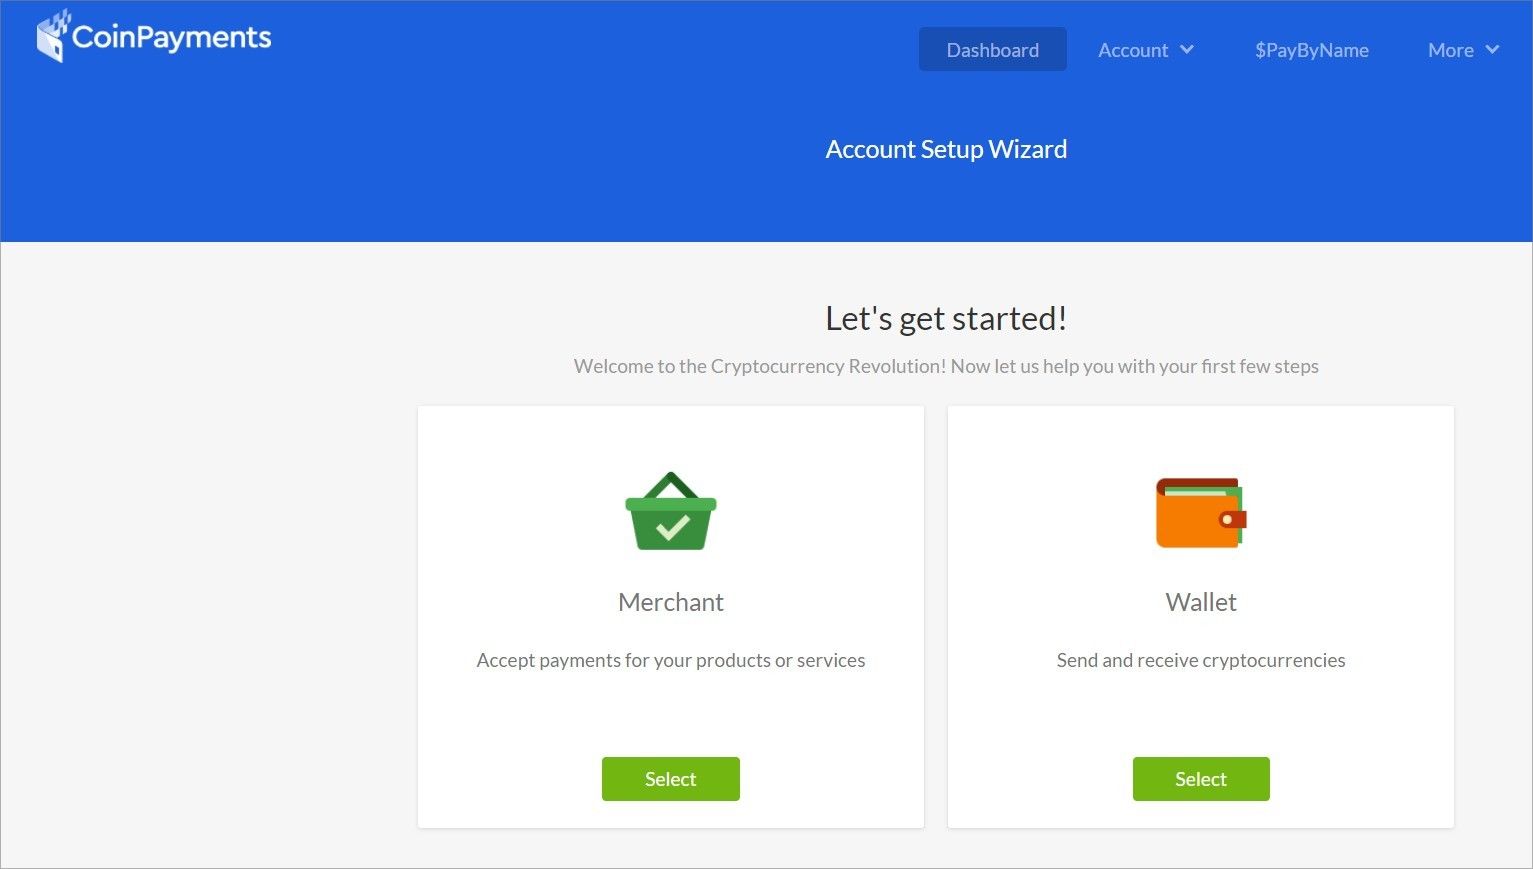
In the dashboard of the CoinPayments platform, you will be able to set the merchant services for your White Label. Please, see the screenshot below
Step 2. Setting Coinpayments to enable your White Label project to accept cryptocurrency
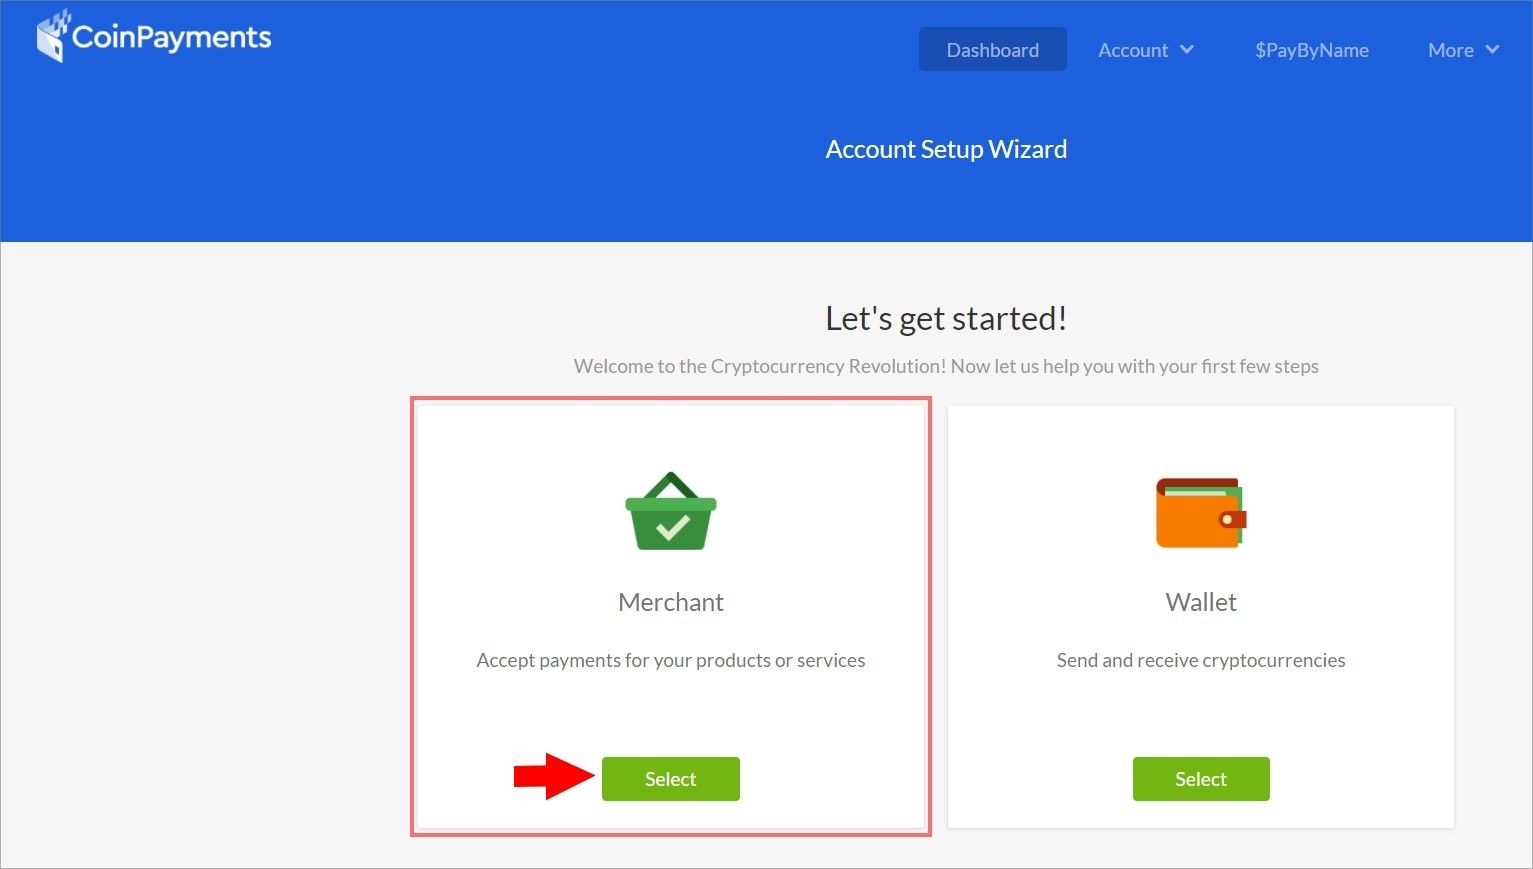
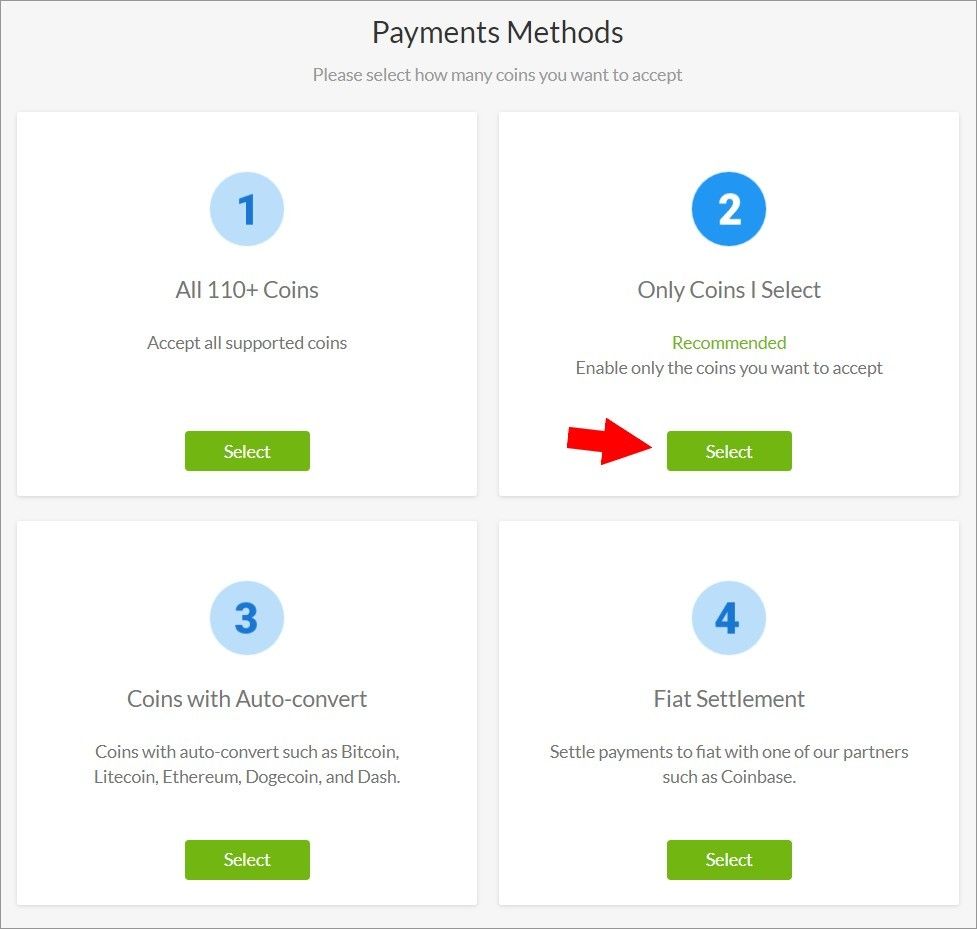
Please, choose the Merchant option in your Coinpayments dashboard by clicking the Choose button. Please, see the screenshot below
You can choose many options. As an example, option # 2 enables users to choose the accepted cryptocurrencies. Please, see the screenshot below
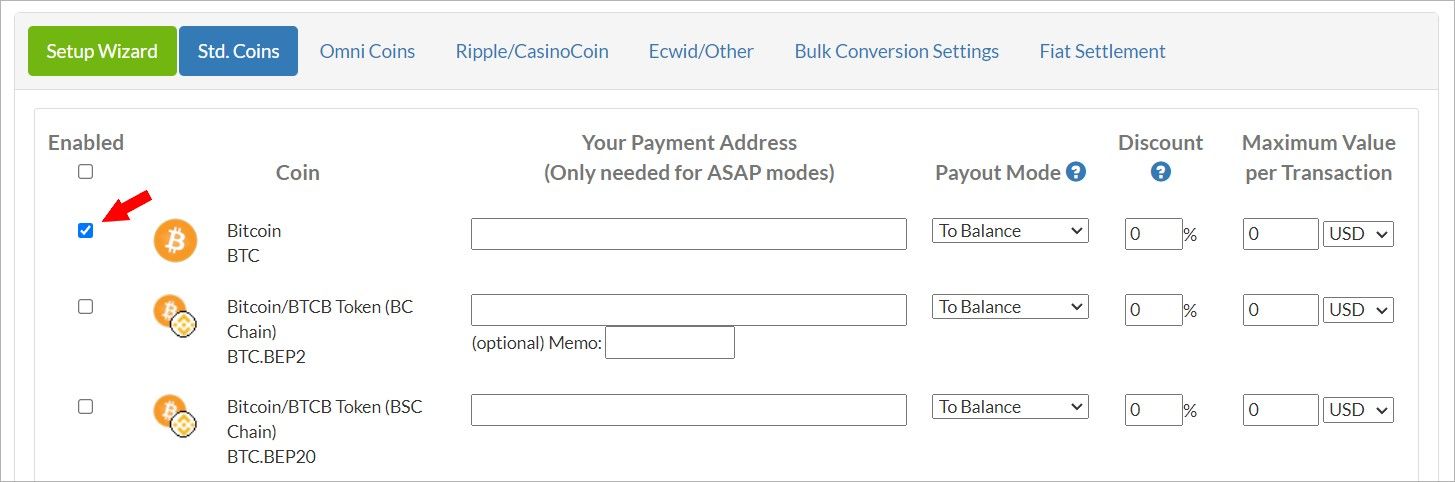
You will be prompted to choose cryptocurrencies you have intent to accept as the payment from the list. Please, checkmark the appropriate box, as shown on the screenshot below.
Click on the Updated Preferred Cryptocurrencies button. Please, see the screenshot below
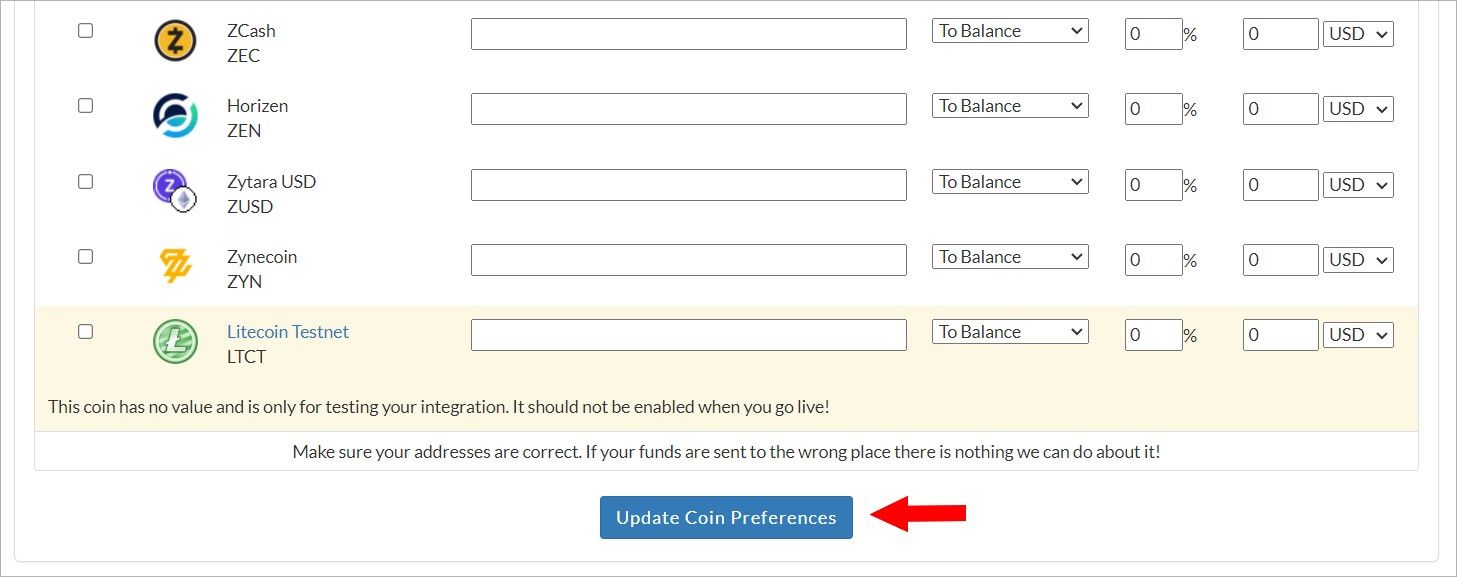
The system will notify you when the update is complete. Please, see the screenshot below

Step 3. Setting up a Coinpayments API key to accept payments
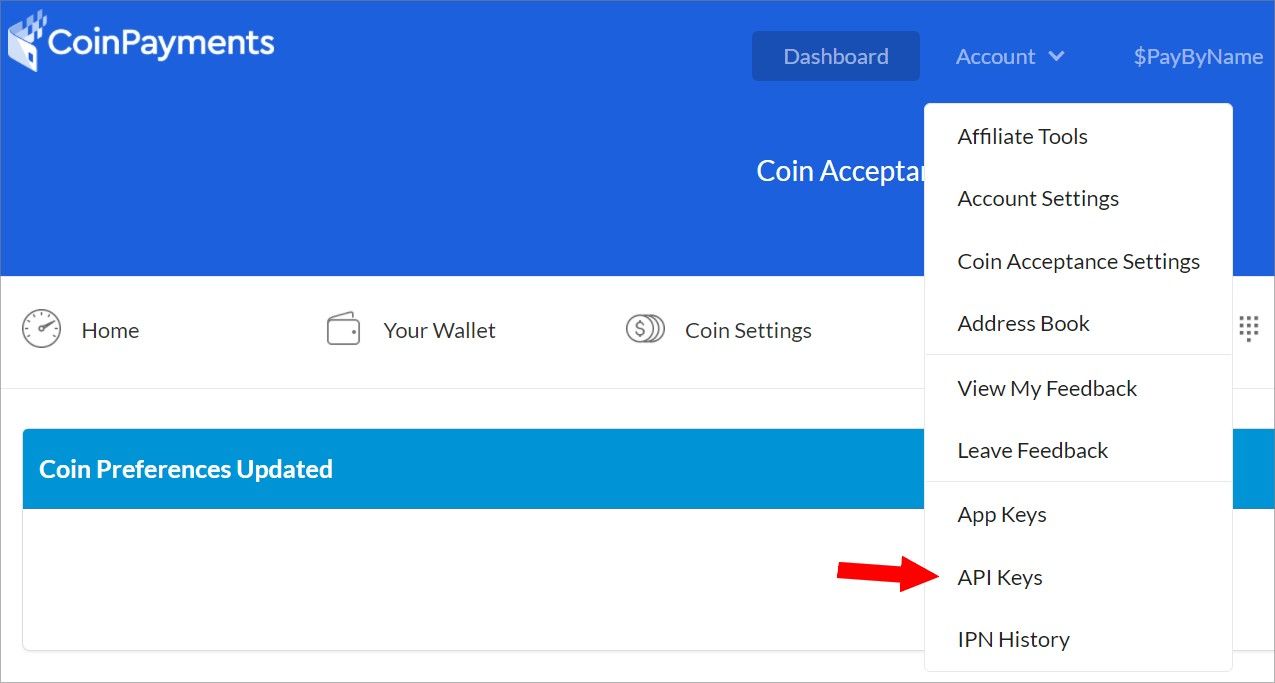
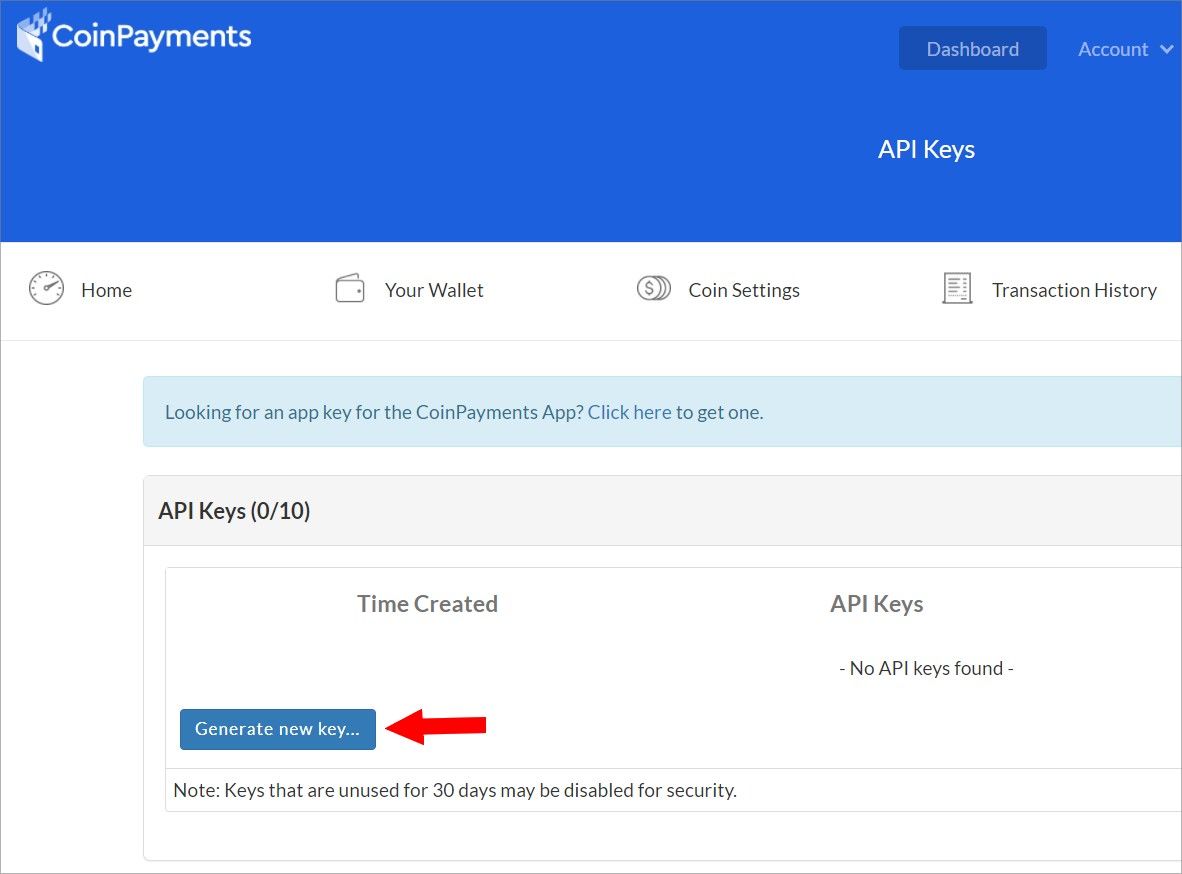
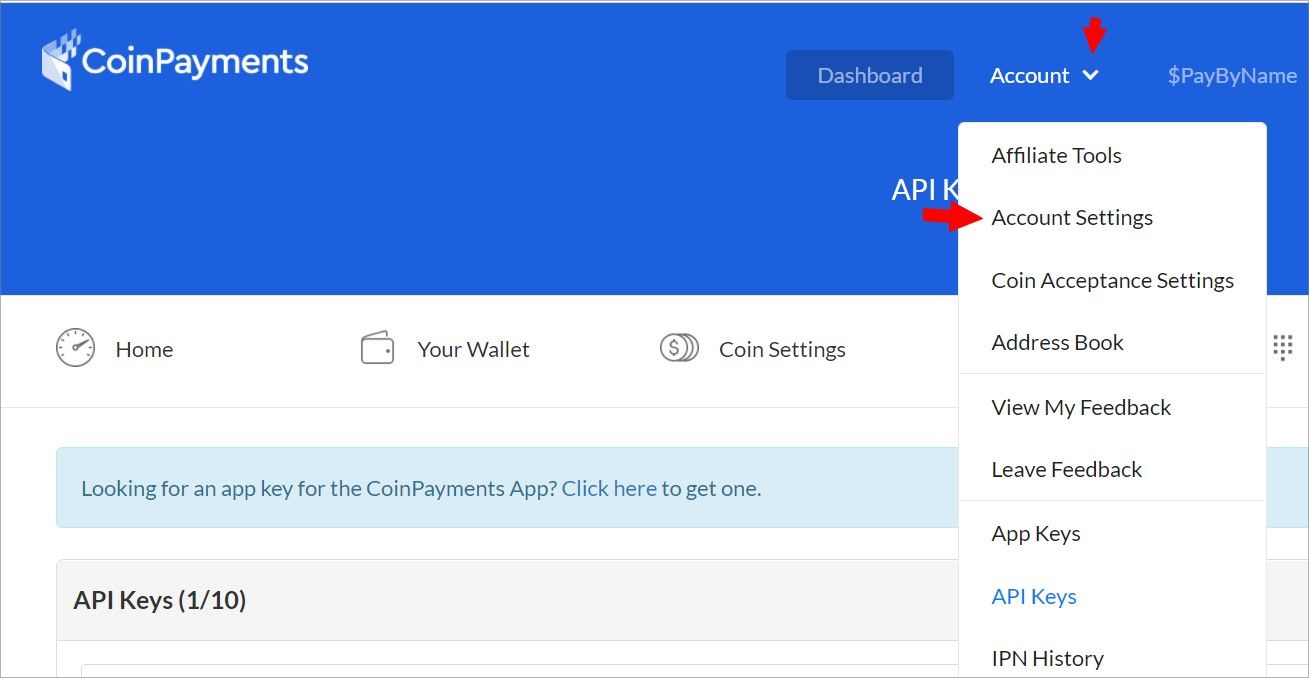
To set an API click on the "Account" and from the dropdown click on the API Keys. Please, see the screenshot below.
Click on the Generate new API Keys. Please, see the screenshot below
The Private and the Public key will be generated. Please, see the screenshot below
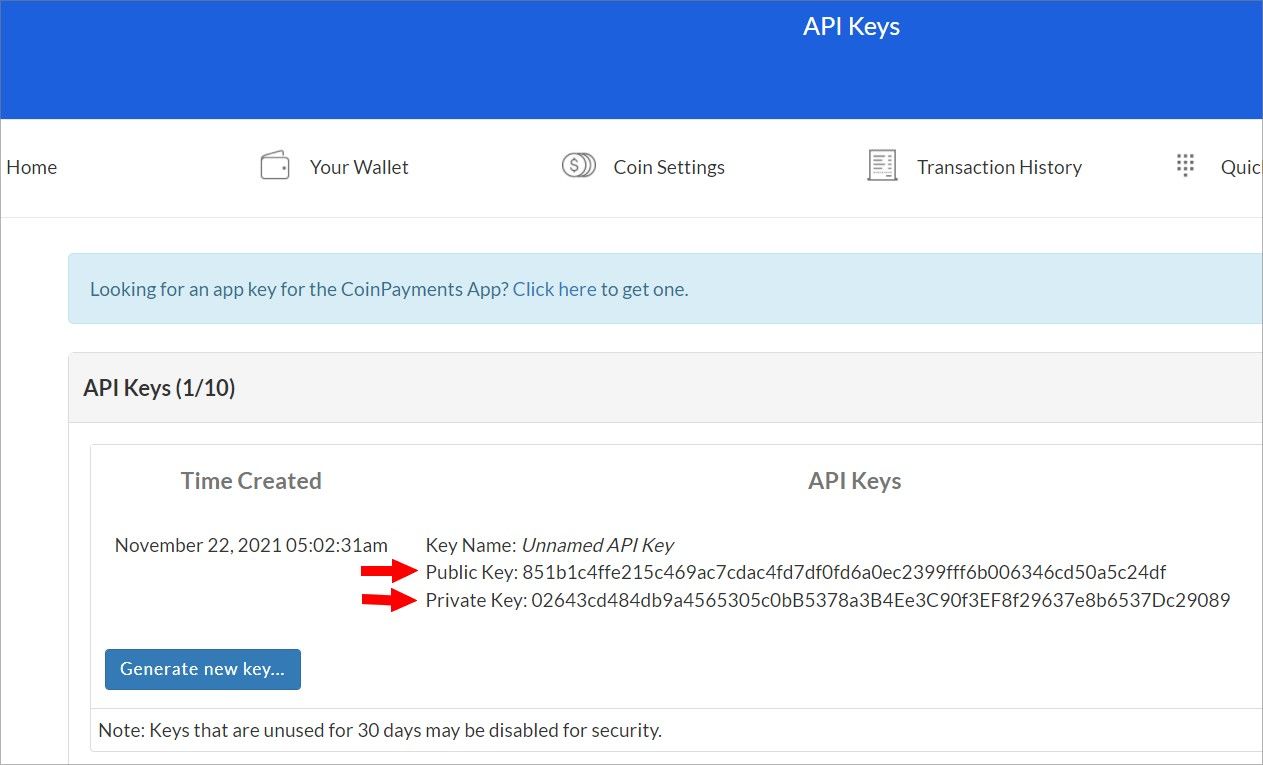
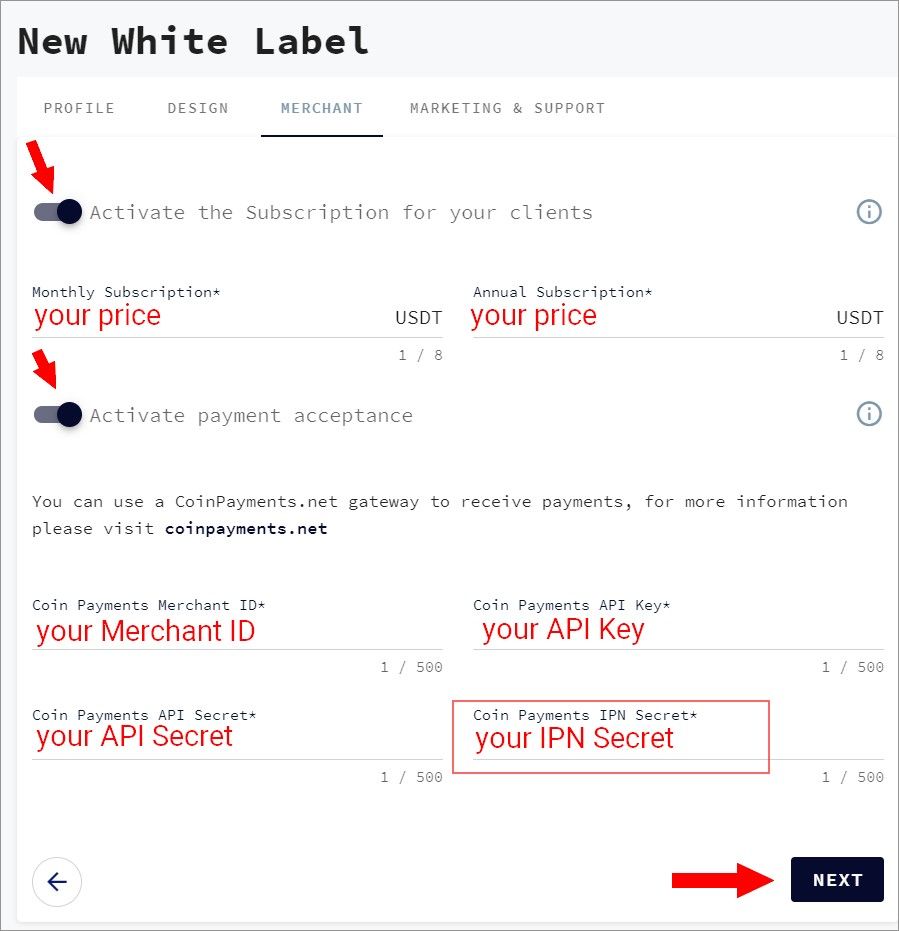
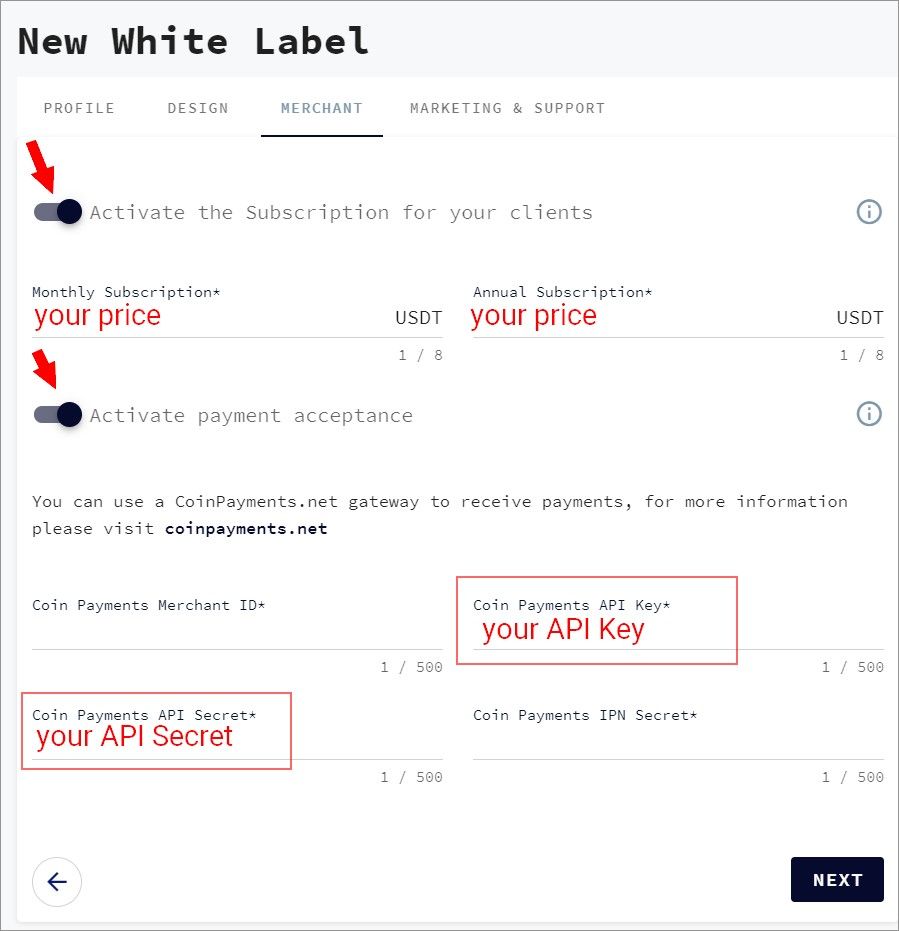
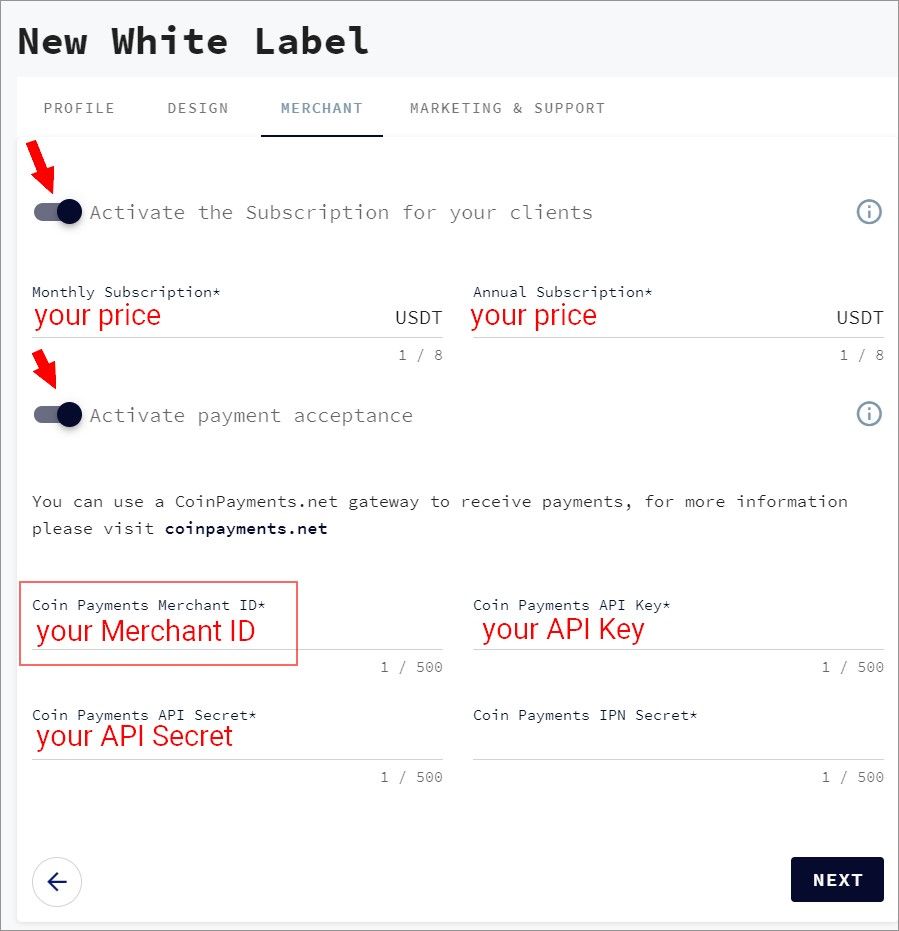
Please copy these keys and paste them into your White Label project in the Accept Payments section. Please, paste a Public key in the Coin Payments API Key* field, and the Private key in the Coin Payments API Secret* field. Please, see the screenshot below
In the same form, you must input a Merchant ID and IPN Secret, associated with your Coinpayments account.
To find your Merchant ID
Click on the Account Settings. Please, see the screenshot below
Your Merchant ID will be displayed. Please, see the screenshot below
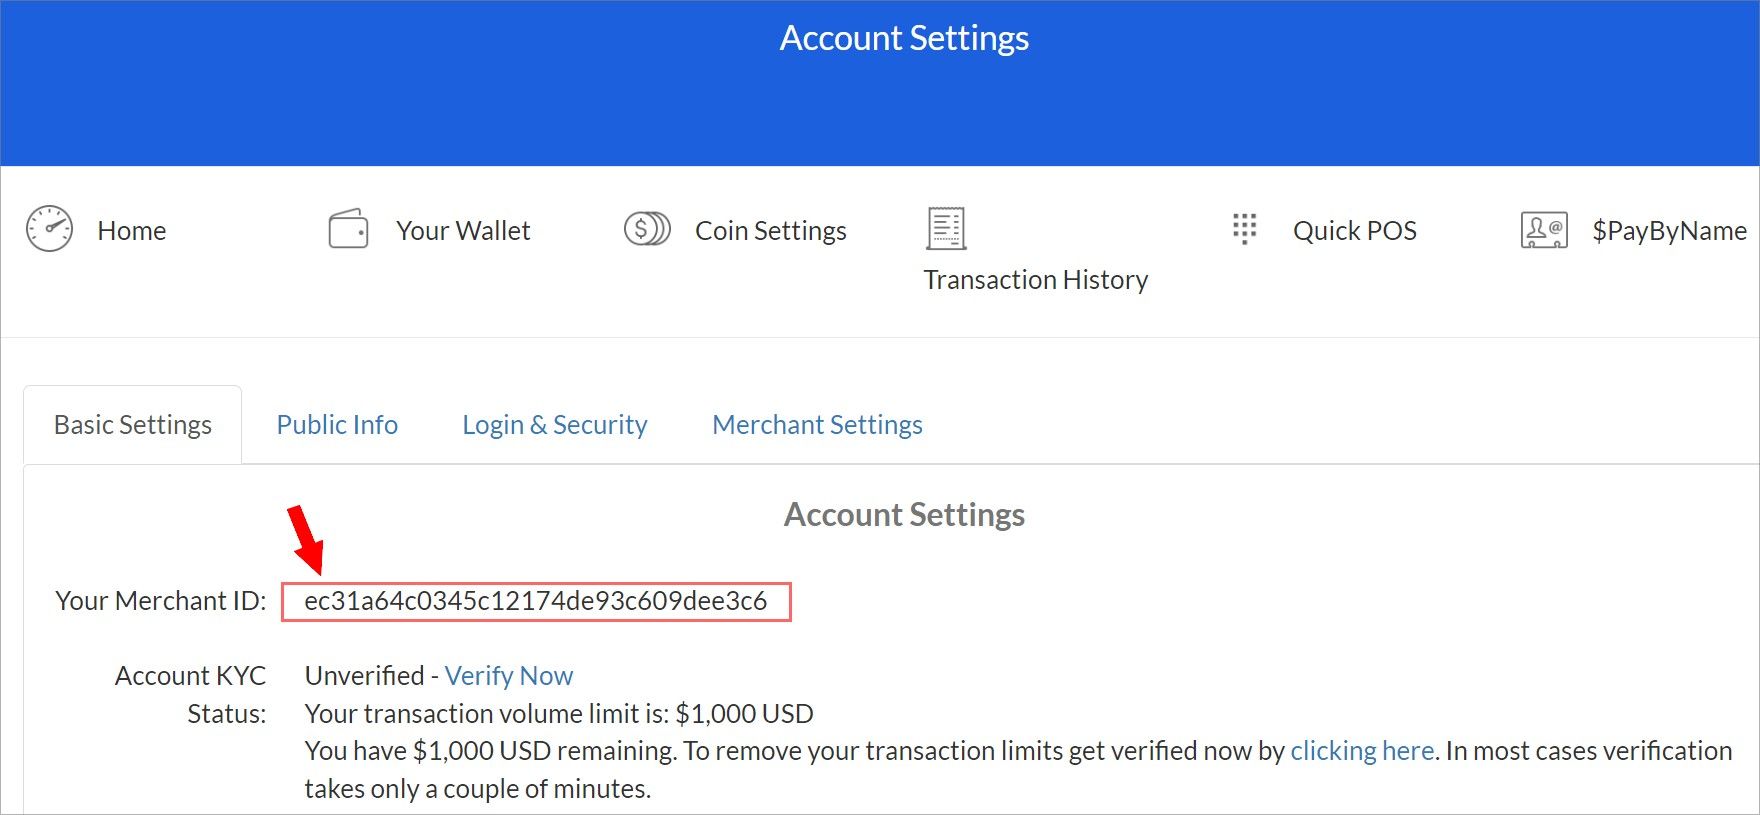
Copy Merchant ID and paste it in the Accept Payments section of your White Label project in the Coin Payments Merchant ID* field. Please, see the screenshot below
Set and Access IPN Secret
In the section Account Settings, under Merchant Settings. Please, see the screenshot below

In the Merchant Settings in the IPN Secret field input any combination of letters, numbers, and characters to set it. Here is an example: Fj73hRahgdfolT4gdiop[Twdhvil
After you enter the IPN click on Update Account. Please, see the screenshot below
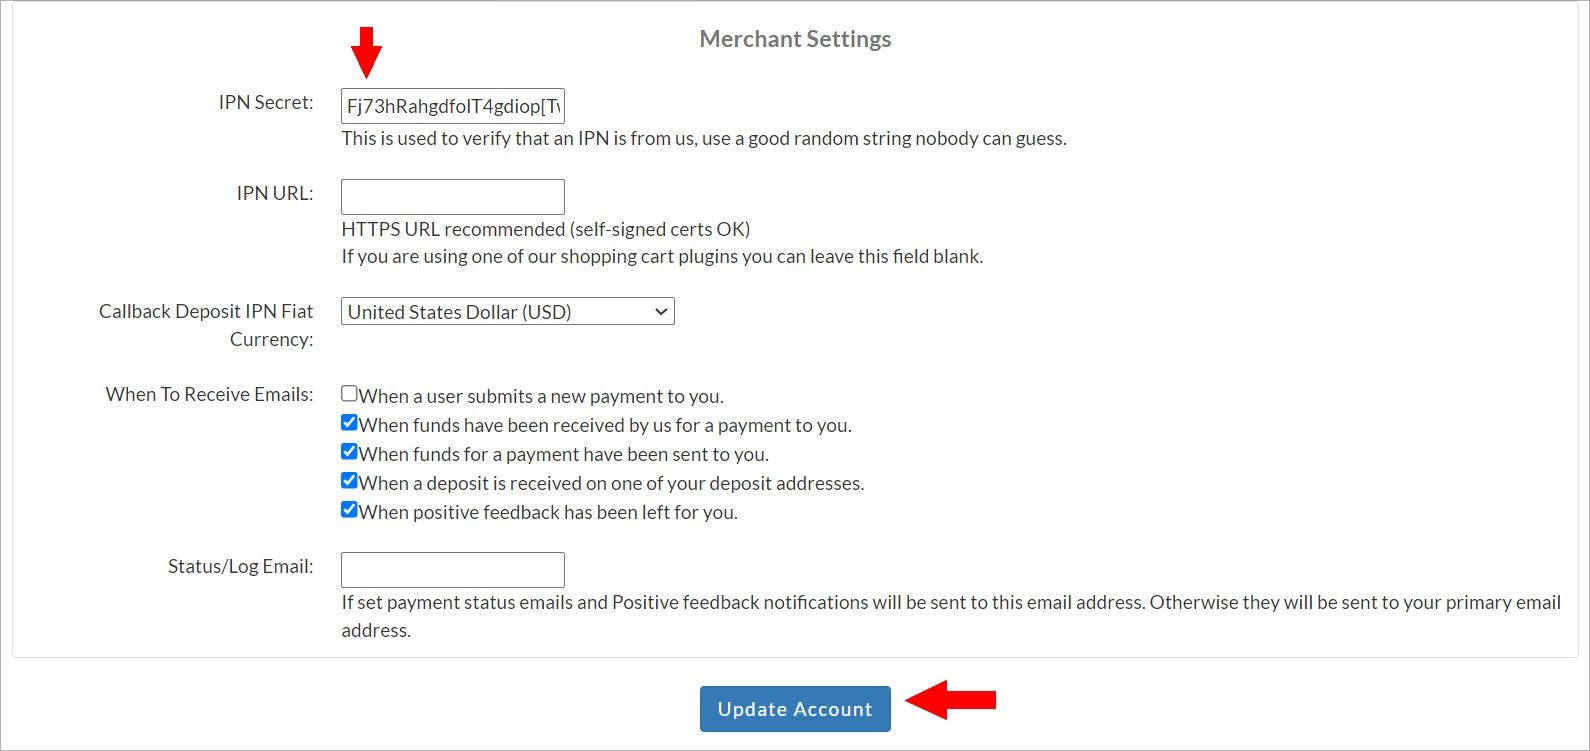
Copy IPN Secret and paste it in the Accept Payments section of your White Label project in the CoinPayments IPN Secret* field. After all the required information in the Accept Payments section is filled in, please click on the Save button. Please, see the screenshot below